What's new

ACT Ryona [ Cinderalle Castle] [しんでられ城] Arms Bless / アームズブレス (RE249106) (RJ249106)


Zepheral

The Dark God Of Lesbians and Memes
Joined
Jun 15, 2014
Messages
5,963
Reputation score
18,908


Link:

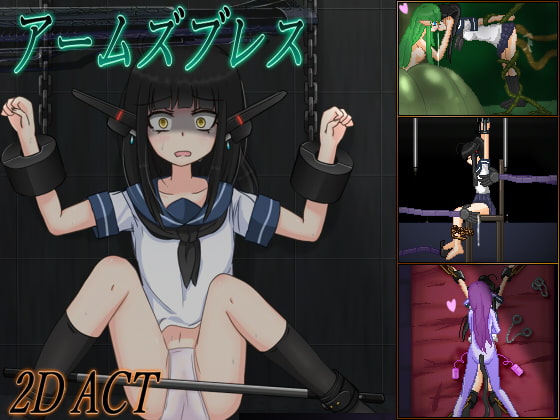
Gameplay: An action fast paced game made with WolfRPG (I think), where you play as female protagonist, with a relatively linear stage progression. The main go is to proceed to the end of the stage like a lot of sonic games to advance (a checkerboard-tiled part of the floor; can't miss it) or defeat the boss should it be a boss stage, violently repulsing the various enemies en route. Major unique mechanics is that the main character gains extra powers once she has achieved certain amounts of gold pickups (for example, 100 awards an extra attack ability, 200 awards another etc).

Scattered around the stages and dropped by defeating enemies are yellow coins, which when collected accumulate an 'EXP' counter; at certain thresholds of EXP (can be seen via the Up+F and Down+F menus in an action stage), Beth will obtain new abilities or obtain upgrades to existing abilities. The majority of them give her more dakka/choppa. Aside from her standard abilities, "Tail Blade" (Z), "Normal Shot" (C), "Air Raid" (aerial Z, direction key optional) and "Burst" (aerial C), all her abilities are shown on the bottom left of the screen, and have a cooldown before they can be reused.

You have a limited health pool but it recovers when you go to the next part of the stage. There are areas you have to fight the boss. You can buy weapons on the shop to upgrade yourself.

Next to boss nodes are usually treasure nodes; they generally unlock only when you manage to no-damage-clear the corresponding boss, and contain phat loot such as a HP extension or a buttload of EXP.

Levels and enemy types of fairly standard (there is one enemy that grabs you and crushes your spine, a second that kisses you as its grab and the others are either melee or ranged with nothing special about them). Killing enemies makes them drop coins. Enemies are quite bulley spongey and bosses hit very hard requiring you to either grind coins for abilities or fight very carefully.

At certain points in levels there are areas or enemies marked with a skull and crossbones that flashes red, signifying "super-dangerous areas".Touching these enemies instantly knocks out your character and starts an H-scene where you can choose to restart that portion of the level or quit (on occasion it may be a pit or a locked room/elevator that takes you to a hand that will initiate an H-scene on contact). The game is difficult so be careful. After you completed a stage you can move you character on the map, also you can re-fight any boss you please.


Controls:
There are different controls based on if you're in a dungeon, or in the overworld map.

Overworld controls:
Directional keys - move the cursor.
Z - confirm.
X - cancel, opens the menu.
C - opens/closes a ranking menu of some sort. Unsure of its use.
V - swaps around the criteria for the ranking. Again, unsure of its use.


"Z" - talk with/examine NPCs/signs and the like; attack with the Tail Blade and Air Raid melee attacks.
"X" - Jump, Cancel, Menu (World Map)
"Space" - menu (dungeon); pause the game; you can opt to return to the title screen, continue the game or (if you've already cleared the stage) return to the world map. You'll probably be returning to the world map a lot if you're going for no-damage boss clears.
"Direction key" - movement
"C" - attack with the Normal Shot and Burst ranged attacks.
"F" - scan the nearest enemy. Beth's comments are usually quite informative and include various tips especially vs bosses, but that admittedly requires you to be able to read the text.
Display “F + ↑”/Display “F + ↓” - opens the skill list, showing what dakka you have and what new dakka you'll get at what EXP threshold.
A, S, D, V - used alone or in combination with directional buttons to use an unlocked ability.

In battle, use the arrow keys and the Z X C V A S D keys.
Please refer to the skill table for command to activate skills.
(You can open the skill list with F + F F +.)


Story:

Your name is Beth, you were made in the year 20xx at the end of the world.
You left the facility that you were made for one thing. To live as your own person.

You play as Beth/Bess, a super-advanced hyper-destructive sapient robotic weapon made by a bunch of mad scientists to take vengeance against the country who had wronged them by trying to stop their research. Except she has the complete set of emotions, morals and free will, so her response to "we are your creators, you were made for the sake of death and destruction, now obey us and crush our enemies" is an "uh, no, killing is bad, can't we talk it out?", leading the mad scientists to try and scrap her. Naturally, she breaks out and fucks off to try to live on her own terms.

Random boss tips:
1. Giant Slime
Essentially the tutorial boss. Has no contact damage. Will open his mouth right before he attacks. Gently stream the slow-moving barrage of black bullets, quickly stream the fast-moving barrage of black bullets, and slip past the scattering of purple bullets. The second version of the purple bullet scatter move lasts much longer, but the bullets will be blocked by the platforms; use that to your advantage. At low HP, can launch a devastating barrage of giant bullets, but he can only fire those bullets horizontally so gain some vertical distance. Gun him down whenever you have the chance.

2. Giant Worm Boss
Comes with two mooks at both ends of the arena; it might be better to eliminate them first, especially the worm on the right end. With some proper positioning you can take out the worm mook by using Gatling(V) right at the start of the battle. Boss' primary attack method is a very quick-moving targeted shot, done 5 times in a row; the shots are quite telegraphed, so if you time your jumps well you can come out unscathed. Use Air Raid or Burst if you need extra movement. Can spawn extra worm mooks; Gatling them down.

3. Dryad
Note: this boss' hitbox is firmly in the human part. Don't bother shooting the plant part.
Will generally cycle between summoning Thorns covering the entire bottom half of the battlefield, and an escalating 1-2-3-4-5 barrage of quick-moving shots. White worms will regularly fall on top of the topmost platform (the only safespot from Thorns), and purple worms with one-hit-kill contact damage spawn occasionally from the boss. Most of Beth's weapons can't really hit things below her that well, but Chase Missile (Up+V) will handily eliminate Thorns and sometimes the white worms too. Use Ignis(S)->Arm Cannon(Up+S) for your primary methods of offense and sprinkle in Burst whenever you can; you can hit the boss from the topmost platform. Air Raid and Burst are, again, your primary mobility tools for getting out of tight spots.

3.5 Giant Spider
The pink spiders don't move, but deal contact damage. The big spider in the center will launch powerful homing explosives that can be set to detonate if hit by sufficiently strong attack (such as Z or down+S). Trigger the explosives next to him and make him eat his own bombs. The barrage he uses as a counterattack afterwards is easier to dodge if you're on the right side of the screen.

4. Moon
Just run.

Fetishes: Ryona, rape, yuri, gangbang, tickling, rape, sailor uniform
 
Last edited by a moderator:

alias34

Cthulhu
Joined
Oct 20, 2012
Messages
1,033
Reputation score
469
Can't even beat that worm boss, and I've yet to see any porn. Really rough game
 
OP
Zepheral

Zepheral

The Dark God Of Lesbians and Memes
Joined
Jun 15, 2014
Messages
5,963
Reputation score
18,908
Can't even beat that worm boss, and I've yet to see any porn. Really rough game
Same. I was hoping that someone would post a save.
 

cacapost

Demon Girl Pro
Joined
Apr 28, 2010
Messages
372
Reputation score
147
It feels like they blew their load on the trailer and preview images. Is there even any h-scenes left to show?
 

dood

Mystic Girl
Joined
Jun 2, 2010
Messages
857
Reputation score
438
You can press C to shoot people and you seem to get more attacks as you get more coins?
 
Last edited:

dood

Mystic Girl
Joined
Jun 2, 2010
Messages
857
Reputation score
438
Completed the game... No gallery though. Also I can't open any of the treasure room doors. I think you might have to scan all the enemies? I really don't know what opens them. I've been getting as many H-scenes as I can too.
 

Attachments

Last edited:

sacredfire

Demon Girl Master
Joined
Sep 5, 2010
Messages
240
Reputation score
69
Completed the game... No gallery though. Also I can't open any of the treasure room doors. I think you might have to scan all the enemies? I really don't know what opens them. I've been getting as many H-scenes as I can too.
Seriously no gallery? How do you rewatch scenes.
 

maliman

Jungle Girl
Joined
Jun 11, 2014
Messages
63
Reputation score
13
Yeah, I'm not finding any h stuff even tooling around the complete save. The heck is it hiding? Does this really need a save for right before each boss that has a scene?
 

dood

Mystic Girl
Joined
Jun 2, 2010
Messages
857
Reputation score
438
The h-scenes are denoted in regular levels with a skull and cross bones. Getting hit by an enemy that has the mark or falling in the hole will cause the H-scene to occur.
 

DarkFire1004

Tentacle Goddess of the H-Section
Staff member
Administrator
Super Moderator
Joined
Nov 10, 2008
Messages
4,905
Reputation score
1,793
This thread has been moved to the H-Section due to a lack of gameplay information. If you wish to preserve this thread, please PM a moderator with an updated OP.
 

sacredfire

Demon Girl Master
Joined
Sep 5, 2010
Messages
240
Reputation score
69
The h-scenes are denoted in regular levels with a skull and cross bones. Getting hit by an enemy that has the mark or falling in the hole will cause the H-scene to occur.
Yea i saw the one at the 2nd stage. Anyone know where some of the other ones are?
 

dood

Mystic Girl
Joined
Jun 2, 2010
Messages
857
Reputation score
438
Yea i saw the one at the 2nd stage. Anyone know where some of the other ones are?
There's a whole bunch in the succubus tower levels 1 and 2 (well three to be exact but that's alot more than most areas have). The plant-girl boss will launch a red maggot that causes a yuri scene on contact.
 
Last edited:

4lurk3r

Demon Girl Master
Joined
Jun 21, 2014
Messages
337
Reputation score
145
So I'm just gonna pop in and write some stuff, I suppose. Hopefully it helps.

Basic storyline outline:
You play as Beth/Bess, a super-advanced hyper-destructive sapient robotic weapon made by a bunch of mad scientists to take vengeance against the country who had wronged them by trying to stop their research. Except she has the complete set of emotions, morals and free will, so her response to "we are your creators, you were made for the sake of death and destruction, now obey us and crush our enemies" is an "uh, no, killing is bad, can't we talk it out?", leading the mad scientists to try and scrap her. Naturally, she breaks out and fucks off to try to live on her own terms.

Gameplay:
The game is a fast-paced 2-d side-scrolling platformer made with WolfRPG (I think) with a relatively linear stage progression. As noted in the OP, your main goal in each stage is to either make your way to the goal zone (a checkerboard-tiled part of the floor; can't miss it) or defeat the boss should it be a boss stage, violently repulsing the various enemies en route. Scattered around the stages and dropped by defeating enemies are yellow coins, which when collected accumulate an 'EXP' counter; at certain thresholds of EXP (can be seen via the Up+F and Down+F menus in an action stage), Beth will obtain new abilities or obtain upgrades to existing abilities. The majority of them give her more dakka/choppa. Aside from her standard abilities, "Tail Blade" (Z), "Normal Shot" (C), "Air Raid" (aerial Z, direction key optional) and "Burst" (aerial C), all her abilities are shown on the bottom left of the screen, and have a cooldown before they can be reused.

Next to boss nodes are usually treasure nodes; they generally unlock only when you manage to no-damage-clear the corresponding boss, and contain phat loot such as a HP extension or a buttload of EXP.

Overworld controls:
Directional keys - move the cursor.
Z - confirm.
X - cancel, opens the menu.
C - opens/closes a ranking menu of some sort. Unsure of its use.
V - swaps around the criteria for the ranking. Again, unsure of its use.

Stage controls:
Directional keys - move.
Z - talk with/examine NPCs/signs and the like; attack with the Tail Blade and Air Raid melee attacks.
X - jump.
C - attack with the Normal Shot and Burst ranged attacks.
F - scan the nearest enemy. Beth's comments are usually quite informative and include various tips especially vs bosses, but that admittedly requires you to be able to read the text.
Up+F/Down+F - opens the skill list, showing what dakka you have and what new dakka you'll get at what EXP threshold.
A, S, D, V - used alone or in combination with directional buttons to use an unlocked ability.
Space - pause the game; you can opt to return to the title screen, continue the game or (if you've already cleared the stage) return to the world map. You'll probably be returning to the world map a lot if you're going for no-damage boss clears.

Scenes:
At times, there may be skull-and-crossbones markers in a stage, signifying "super-dangerous areas". Get caught in whatever's making the marker for the scene.

Random boss tips:
1. Giant Slime
Essentially the tutorial boss. Has no contact damage. Will open his mouth right before he attacks. Gently stream the slow-moving barrage of black bullets, quickly stream the fast-moving barrage of black bullets, and slip past the scattering of purple bullets. The second version of the purple bullet scatter move lasts much longer, but the bullets will be blocked by the platforms; use that to your advantage. At low HP, can launch a devastating barrage of giant bullets, but he can only fire those bullets horizontally so gain some vertical distance. Gun him down whenever you have the chance.

2. Giant Worm Boss
Comes with two mooks at both ends of the arena; it might be better to eliminate them first, especially the worm on the right end. With some proper positioning you can take out the worm mook by using Gatling(V) right at the start of the battle. Boss' primary attack method is a very quick-moving targeted shot, done 5 times in a row; the shots are quite telegraphed, so if you time your jumps well you can come out unscathed. Use Air Raid or Burst if you need extra movement. Can spawn extra worm mooks; Gatling them down.

3. Dryad
Note: this boss' hitbox is firmly in the human part. Don't bother shooting the plant part.
Will generally cycle between summoning Thorns covering the entire bottom half of the battlefield, and an escalating 1-2-3-4-5 barrage of quick-moving shots. White worms will regularly fall on top of the topmost platform (the only safespot from Thorns), and purple worms with one-hit-kill contact damage spawn occasionally from the boss. Most of Beth's weapons can't really hit things below her that well, but Chase Missile (Up+V) will handily eliminate Thorns and sometimes the white worms too. Use Ignis(S)->Arm Cannon(Up+S) for your primary methods of offense and sprinkle in Burst whenever you can; you can hit the boss from the topmost platform. Air Raid and Burst are, again, your primary mobility tools for getting out of tight spots.

3.5 Giant Spider
The pink spiders don't move, but deal contact damage. The big spider in the center will launch powerful homing explosives that can be set to detonate if hit by sufficiently strong attack (such as Z or down+S). Trigger the explosives next to him and make him eat his own bombs. The barrage he uses as a counterattack afterwards is easier to dodge if you're on the right side of the screen.

4. Moon
Just run.

5. Witch
In the first phase, she will summon a bunch of insects, drops icicles, spawn a magic circle that sprays bullets, and drops rocks on you, in that exact order, in the same exact repeating pattern, each punctuated with a teleport.
Eliminate the roses in the sides of the area first. Use the upgraded Burst or Arm Cannon to clear the insects ASAP, dodge around the icicles/rocks OR use the Laser Blade (Down+S) upgrade that spawns a protective spinning yellow blade around you to eliminate the icicles/rocks, and use Arm Cannon to destroy the magic circle before it does anything. As soon as you get the pattern down, it's pretty easy.
In the second phase, she will float around and shoot non-targeted bullets in a Y pattern 4 times, then move to the right side of the screen to spawn a horde of destructible bat bullets (Burst them down), again fire off 4 Y-shots, move to the left side of the screen and send a rapid barrage rightwards (stay on the bottom left to blindspot the barrage), then fill the entire lower level with fire (just stand on the top level). Rinse and repeat.

5.5 Super Hellhound
Dodge over the quick aimed shot. Stay away from the exploding 'firework' shots. Dodge over another aimed shot. Move close to him to blindspot the 4-way spread. Dodge over and under 5 consecutive aimed shots. Stay away from another wave of 'fireworks'. Stream the huge barrage of aimed bullets. Rinse and repeat. Attack whenever able, and abuse the instant movement of Air Raid.

6. Drunken Bird Hero
Does not move. Has only one, very telegraphed attack. Start from the bottom-right corner and stream to the left. Attack whenever able.

7. Pirate Boss
Has some degree of contact damage.
Abuse Air Raid's instant movement to dodge the hell out of his attempts to tackle you, and bombard him whenever he stops to fire off an 8-way barrage, a spread of green waves, or spawn mooks. If you're tricky enough with maneuvering you can make his attacks go wide pretty easily. If he floats above you while glowing red, keep moving, and GTFO from the incoming superattack when he stops moving.

8. Kraken
The boss is perfectly stationary and you have a lot of room to work with. While the tentacles around the boss are invulnerable, they're still stationary, so you can easily just keep up the ranged bombardment while dodging his shots. Pretty easy all things considered.

8.5 Old Beast
Like most bosses, has a fixed pattern interspersed with movement. Dodge the 3 aimed shots, dodge the bigger, faster aimed shot, then put one of the platforms between him and you to hide from the veritable 360' barrage he throws out afterward. Attack when able, as usual. Chase Missile and Satellite Strike are probably best, as they can be used with awkward differences in elevation.

9. Lord of the Volcano
Will hop 3 times before launching a spread barrage of punchwaves, teleport a few times, then lob an aimed spirit bomb at you, then repeat. The spread barrage locks him to one direction, so if you manage to cross up behind him just as he begins the spread barrage, you have several seconds to bombard him with an Arm Cannon or a Chase Missile. At low HP (he'll have a text box), he'll stop with the formalities and just spam spirit bombs; adapt as necessary. Don't be greedy and whittle him down until you can end the fight with a Meteodrive (A) or something.

9.5 Ent
Terrain is the bigger enemy here. Against the magmaballs that rise from the ground, just jump. Don't spend more time airborne than you have to, and don't use things like Burst or Air Raid unless you're sure you're in the clear. When you hear a sound cue, make sure you're on one of the three leftmost pillars, jump up, Air Raid upwards, then Burst to avoid and maintain altitude above the thorns and magma. Maintain a machinegun barrage whenever able.

10. Thunder Dragon
Pattern: he'll first shoot a stream of aimed shots (dodge), try to rain bullets on your head 4 times (stay away from 'directly underneath him'), then teleport to the center, spray a random omnidirectional spread, then send down "thunderclap" bullets that explode into 2 gigantic damaging trails expanding outwards to the sides. Jump over the damaging trails, using Air Raid/Burst's extra airtime when necessary, and/or abuse how Super Chase Missile (the upgrade to Up+V), Arm Cannon and Concentrate (D) can be used in mid-air to stop your fall for the moment. Don't be greedy, especially when the next move is the 'rain from above' one.

11. Purple Slime Overdosed On Life-Ups
Every time he jumps and lands, he'll create an 8-way spread of heart bullets; every time he opens his mouth, he'll shoot a stream of aimed heart bullets. Both have staggered timings. Honestly I'm not quite sure how to give tips here. His attacks are simple, but avoiding them can be a bit tricky, especially when the jump and stream happen simultaneously.

12. Maou
Has armor, meaning your less powerful hits like Satellite Strike won't do jack. Will send aimed blocky bullets (dodge), then scatter a spread of one-direction punchwaves (gain some vertical distance or slip behind him), then call upon "thunderclap" bullets from above (stream them, abusing the platforms in the arena), then send out a huge stream of fast aimed bullets (stream-dodge). Attack whenever able; Super Chase Missile is probably your best friend here, but slip in some shots of Arm Cannon, Concentrate or Eclair(Down+D) whenever able, since they do tons of damage and don't leave you vulnerable for long.

12.5 Lilim
Pattern: she'll teleport behind you and shoot a 4-way heart bullet spread, do another teleport 4-way (run away or dodge over), stop and create 4 explosions marked by markers on the floor (stay away from the markers and bombard her in the meantime), launch a horizontal barrage of big bullets (dodge over), summon guns to spread dakka across the screen (blindspot on the bottom left of the arena), spread a huge number of destructible heart bullets (counter with a Burst or something), do yet another teleport 4-way, then warp to the center and slam a huge sword down (just stay away and dodge the aftershocks). Repeat. Attack whenever able, especially when she's charging up the marker-explosion or summon-gun moves.

13. Evil Goddess Statue
The boss itself is stationary, but has an invincible summon who can shoot an aimed shot, create 'trap' stationary bullets that stay on the screen basically forever, and create a veritable spread of blue bullets. The summon's attacks can be handily dispelled by throwing in Ignis(S), but only by the main 'body' of the pod that Ignis shoots out. Attack whenever able and rush her down before the 'trap' bullets overwhelm you.

14. Last Battle
The boss has 3 parts: the mouth, the eye and the hand. The mouth spawns mooks, the eye shoots bullets (spread and aimed), the hand stays on the bottom floor and tries to ram you in a very telegraphed but very painful manner. The mouth and eye are invincible, normally; you need to hit the crystal on the bottom-right or the bottom-left of the arena to dispel the barrier on the mouth and the eye, respectively; dispelling the barrier causes the boss to try to hit you with 3 targeted lightningbolts from above, so dodge sideways after smashing a crystal.
By the time you've gotten the mouth and eye taken down, the hand is pretty much a free kill because of how telegraphed its moves are.
 
Last edited:

Maryel

Lurker
Joined
Jun 10, 2009
Messages
1,130
Reputation score
79
i seriously want to ask how many H this has.. so far only around 3 or 4 scenes only. every other its just her crying and closed doors with sounds....
 
Top